
The Web Booking widget can be located anywhere on a website and can be added in multiple places. How can you do that?
Here’s a step by step guide explaining how to integrate the Web Booking and Customer Account widgets with your website.
CNAME setup
Set up a CNAME record in your DNS zone for your domain as follows "app.[your_domain_name_here]" and point it to "[XXX].eto2.taxi". The part marked in square brackets should be replaced with your own data. Please inform us when this has been done and provide what domain you have used.
If you use CloudFlare to manage your DNS settings, make sure the CNAME record is also set there and proxy mode is disabled.
Please read more what CNAME is. You can set CNAME from your domain account. If you not sure how to do it, please contact your domain provider.
Prepare your website
For full integration, these three elements should be added to your website:
- Intro Web Booking widget - a first step of the booking form designed to engage customers, usually located on the top of your homepage. Choose entering From, To, Date and Time and price is displayed.
- Web Booking widget - allows customers to complete their booking and pay for it.
- Customer account widget - allows customers to open an account, edit their user profile, add new and manage existing bookings.
Choose 3 existing pages or create 3 new ones on your website that function as:
- Homepage (for the Intro Web Booking widget),
- My bookings site (for the Web Booking Widget)
- Customer account (for the Customer account widget).
Now go back to the EasyTaxiOffice Dispatch Panel to update these website URLs.
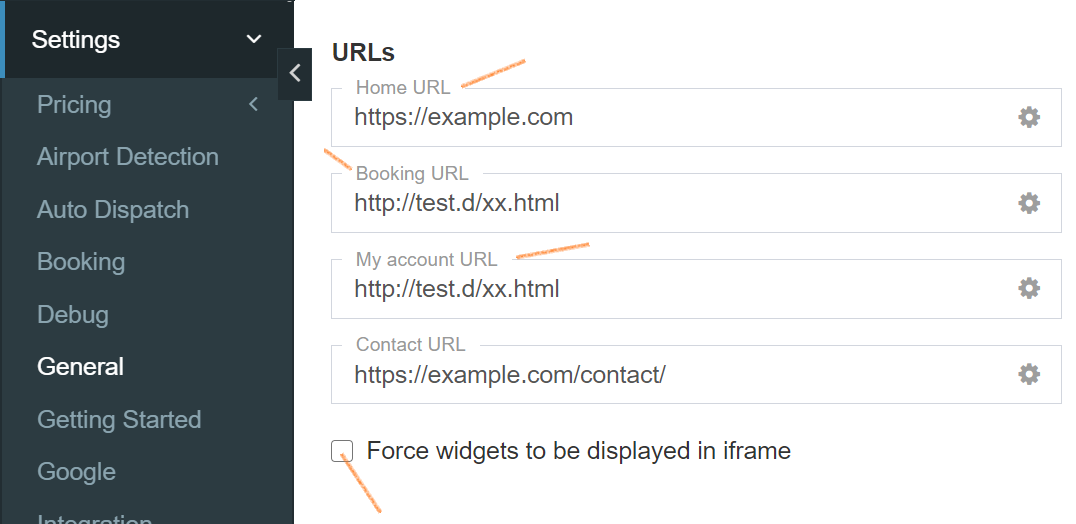
- Go to Dispatch Panel -> Settings -> General -> URLs section
- Update the website pages URLs on which you added the Intro Booking, Booking and Customer Account widgets.
- Tick the option "Force widgets to be displayed in iframe" which makes sure the widgets are displayed only on your website instead of any new page.
Once you have created all pages then you can advance to one of the integration methods explained below.
Integration: HTML or WordPress
There are two ways to integrate the Web Booking Widget with the EasyTaxiOffice software.
WordPress Plugin
To install the Web Booking Widget on your WordPress-powered website, you need to:
1) Download our plugin
Use this link to download our plugin to your hard drive.
2) Install the plugin
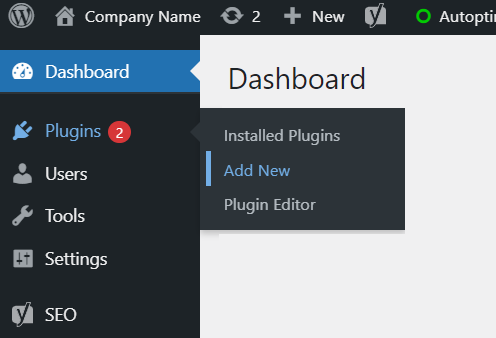
In your website’s admin panel side menu go to Plugins -> Add new.
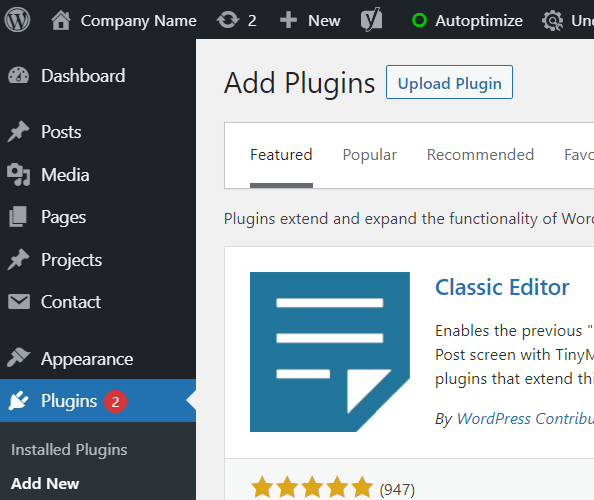
Then, at the top of the site, click Upload Plugin.
Choose the .zip file with our plugin that you downloaded in Step 1 and click Install Now.
3) Activate the plugin
After installing, go to Installed Plugins, find EasyTaxiOffice and click on Activate.

4) Plugin settings: Software URL, Site Key
The Installed Plugins site will refresh automatically and a Settings option will appear under the EasyTaxiOffice plugin. Click it.
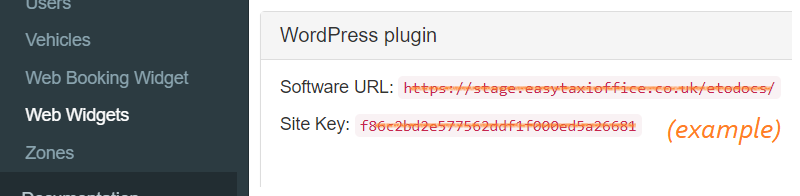
In the Settings, you need to enter your Software URL and Site Key.
The key can be found in your EasyTaxiOffice Dispatch Panel -> Settings -> Web Widgets. Just copy and paste them to the plugin settings. Click Save Changes.
The plugin is active now.
5) Add code
For the booking or customer account widgets to appear in a particular place on the website, you need to copy a short text called the “code” and paste it on the correct pages.
This is what the codes look like:
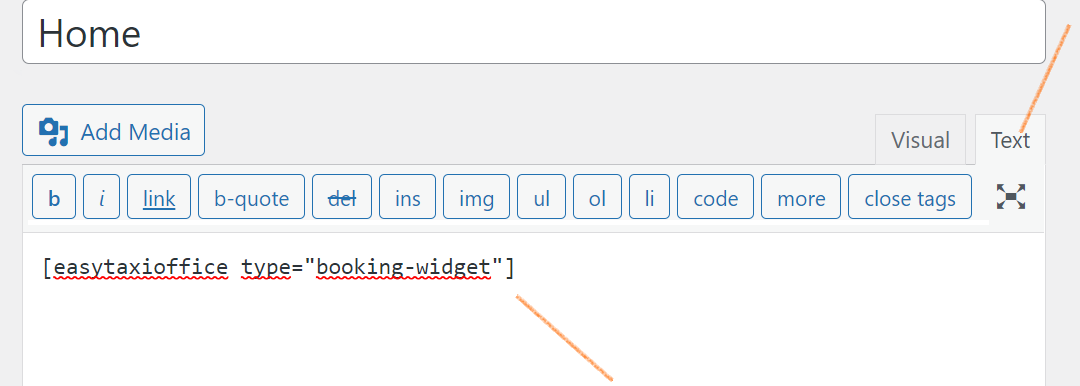
Homepage / Intro-Booking Widget:
[easytaxioffice type="booking-widget"]

Bookings / Booking Widget:
[easytaxioffice type="booking"]

Customer account:
[easytaxioffice type="customer"]
To add the codes to your pages, go to Pages in the WordPress side-menu and then click Edit on the site you would like to change.
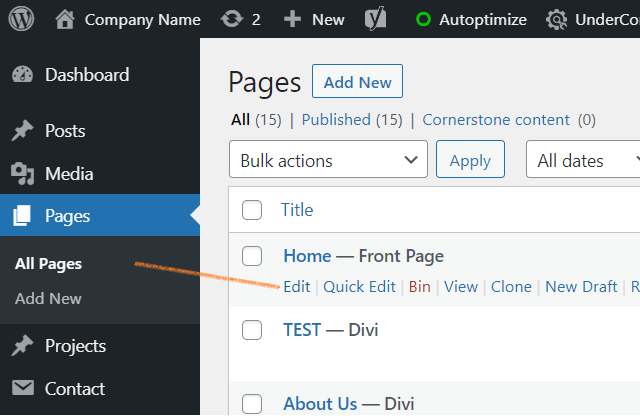
Copy and paste the code in the Text editor, not Visual.
That’s it.
You have successfully integrated the web booking widget with your website.
HTML
How to integrate the Web Booking Widget with your website using HTML? Just copy and paste the HTML code.
1) Where can I find the widget code?
The code that you need to copy and paste is specific for your account.
You can find it in your EasyTaxiOffice Dispatch Panel -> Settings -> Web Widgets -> HTML.
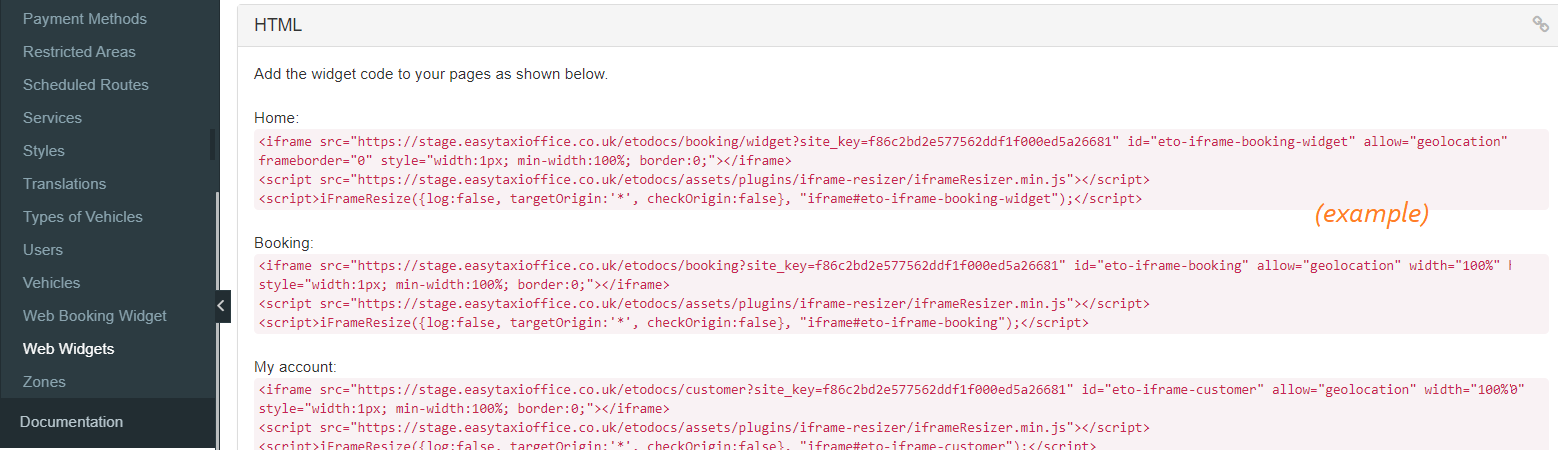
2) Add the widget code
Depending on what software you are using to manage and edit your website, this process might look different.
The right code needs to be added to the right site: the Intro Widget to the Homepage, Booking Widget to the Bookings site and the Customer Account to a accounts site.

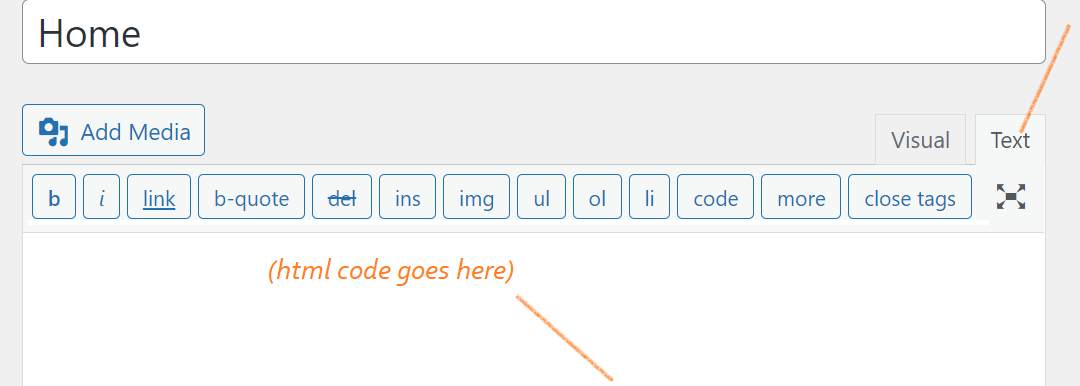
If you are using a CMS like WordPress, please remember to copy and paste the code in the Text editor, not the Visual editor.
How to pre-set booking widget details using shortcode with the WordPress integration plugin?
Log in to your WordPress admin panel.
2. Create or Edit a Post or Page:
You can add the shortcode to an existing post or page, or create a new one.
3. Insert the Shortcode:
In the post/page editor, place your cursor where you want to insert the shortcode.
4. Paste the Shortcode:
Paste the [easytaxioffice type="booking-widget" from="" to="" via="" date=""] shortcode into the editor at the desired location.
5. Customize the Shortcode:
Modify the shortcode attributes as needed:
* to: Specify the drop-off location (optional).
* via: Add any intermediate stops separated with "|" (optional).
* date: Set the date using this format "Y-m-d H:i" (optional).
Example: [easytaxioffice type="booking-widget" from="Heatrhow" to="Gatwick" via="London" date="2024-01-01 12:30"]
6. Publish or Update:
If you're creating a new post or making changes to an existing one, click the "Publish" or "Update" button to save your changes.
7. Preview or View the Page:
To see the shortcode in action, you can either preview the post/page or visit it on your live website.
The shortcode will be replaced with the taxi booking widget on your WordPress page or post, and users will be able to use it to book a taxi with the specified details.
Ensure that the plugin associated with this shortcode is installed and activated for it to work correctly. If you encounter any issues, refer to the documentation for troubleshooting.